

Thursday, October 11, 2012
October Stamp of the Month Artwork

Wednesday, October 10, 2012
Coordinate with Cricut® Cuts
Learn how to use your stamps to bring Cricut® cut-outs to life! Many Cricut® shapes from the Artiste and Art Philosophy collections coordinate with stamp sets so you have more potential for creating, decorating, and accessorizing! Check out the video:
Tuesday, October 9, 2012
Studio J® Tricks to Add Flair to Your Layouts
Even though Studio J® is fast and easy to use, it is helpful to know some great tricks that can make customizing your layouts even more exciting. Here are some Studio J tricks straight from our professional Close To My Heart artists:
- Customize your background and texture paper. You can change the color and intensity of the background and texture paper included in whichever kit you choose. Simply select the piece of background and texture paper, change the color in the color selection tool, and increase or decrease the intensity of the color in that same popup box.
- Crop My Stickease® quotes, titles, and tags. The cropping feature on the My Stickease images allows you to select a section of a quote, title, or tag to use as a border or other embellishment.
- Create a customized My Stickease image. If you have a specific image in mind to use as an embellishment on your page, you can create a customized My Stickease to fit your theme perfectly. Simply add a text box, photo hanger, ribbon, ribbon slides, and Stickease to create the little suitcase! So easy! Be sure to crop or send elements behind other elements when necessary, and add several elements together for a unique look!

- Select more than one element at a time. If you want to move several elements of your layout at once, simply click and drag your mouse around the elements you would like to select. Let’s take buttons, for example. After the buttons have been selected, you can click the icons in the popup box to choose to align the buttons vertically or horizontally if you desire.
- Make faux washi tape with vellum text boxes. To create the look of a piece of clear washi tape, make a small rectangular text box, filled with vellum background (this is the default color for text boxes). You can make the tape strips as large or small as you want, or even layer them for more emphasis.

- Stretch one photo across multiple photo wells. If you have fewer photos than photo wells, instead of deleting the excess wells, try scaling the picture to a larger size and then copying the picture to other photo wells and matching the photos up until they align with an almost seamless image. This trick works best with photo wells that are adjacent to each other.
- Create ruffled ribbon. Select “Ribbons” in the drop-down menu under the Embellishments toolset. Choose ribbon tab and rotate the tab so that it is vertical on the page. Then layer several tabs on top of one another, sending every other one to the back to create a ruffled look.

- Create a jagged border with text boxes. You can create a jagged border simply by rotating multiple text boxes about 45 degrees and making them the same color as the background. Put these boxes on top of a long, rectangular box of another color, and you’ve got a jagged border!

- Change the background of your layout. Sometimes you may like the photo and journal arrangement in a layout, and yet want to change the background colors. Because photos sit on top of everything else, this is easy to do. Simply pull a journaling box over the space you want for a different background and fill it with a color from the color selection tool or a patterned paper from the Papers toolset. Then, send it backwards until the photo wells are on top of your new background.
- Bonus Trick! Use keyboard keys to make embellishments. Did you know that some of the best tools for creating custom embellishments are the basic keys on your keyboard? It’s as simple as typing into a journaling box with no background color. Use periods to make a polka dot pattern, angle brackets to create a trendy Chevron look, overlapping pound signs to make burlap, question marks to make rope, and so much more!

Monday, October 8, 2012
November Club Layouts - Clementine Kit


We'll be creating autumn-themed layouts using the Clementine Kit, Cottage Assortment and Sparkles Brown & Tan Assortment. One layout will be perfect for your Thanksgiving celebration and the other can be used for your pumpkin patch, pumpkin carving or any other autumn photos you have. The layout designs were originally created for our team swap by Mary, Kirsten P., and Kirsten H. I changed some of the kit papers and put my own finishing touches on each of them. I also used the rest of the kit papers to create a thank you card.
Club members will be pre-ordering their kits this week. If you would like to order this kit, please contact me by 10/19/12.
Wednesday, October 3, 2012
Organize Your Craft Supplies!
One of my favorite CTMH products from the Autumn/Winter Idea Book is our new organizers for all your craft supplies! The new stackable storage containers allow you to customize for your personal storage needs. You can choose any combination of small or medium containers and either craft box inserts or foam inserts to hold your items securely in the container. Craft Boxes are sold separately in sets of 3, so you can order as many as you need. Watch the video below to see how this new organization system works. Click here to view and order any of our organizational products.
Monday, October 1, 2012
October Specials - FREE Studio J Layouts!
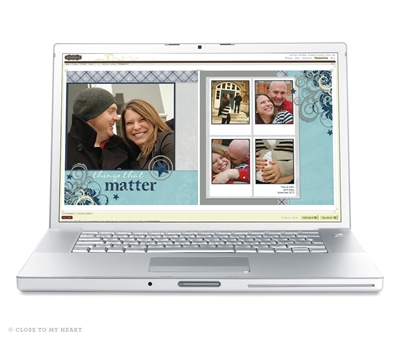
GET 4 FREE STUDIO J LAYOUTS!
Get a free Studio J® layout in October! In this special promotion, you will receive a free custom-printed layout when you buy 9 custom-printed Studio J layouts. To receive the discount, just add 10 or more layouts to your cart. You’ll see a discount reflected in your order total. And you can totally take advantage of this promotion by ordering in multiples of 10. Buy 9, get 1 free. Buy 18, get 2 free. Buy 27, get 3 free. Up to 4 free layouts! It’s a great time to use any Member Bonus layouts you may have. If you haven’t tried Studio J yet, now is the time to start! Click here to enter Studio J.
Have you seen the Studio J® Express Collections? Click on this video to find out more:
October Specials
We have an awesome stamp set special that is only available this month -- the October Stamp of the Month, VERY MERRY CHRISTMAS! This set is so versatile for creating beautiful holiday greeting cards, gift wrappings, gift tags and holiday scrapbook layouts.
Do you have our new CTMH Cricut Artiste Collection? Then this stamp set is a MUST! All five of the main images in this stamp set coordinate with this Cricut cartridge, so cutting the image shapes will be fast & easy!


This stamp set is only $17.95 OR just $5. with a $50 purchase. Click here to purchase.
Subscribe to:
Posts (Atom)